2026-5-22 | React
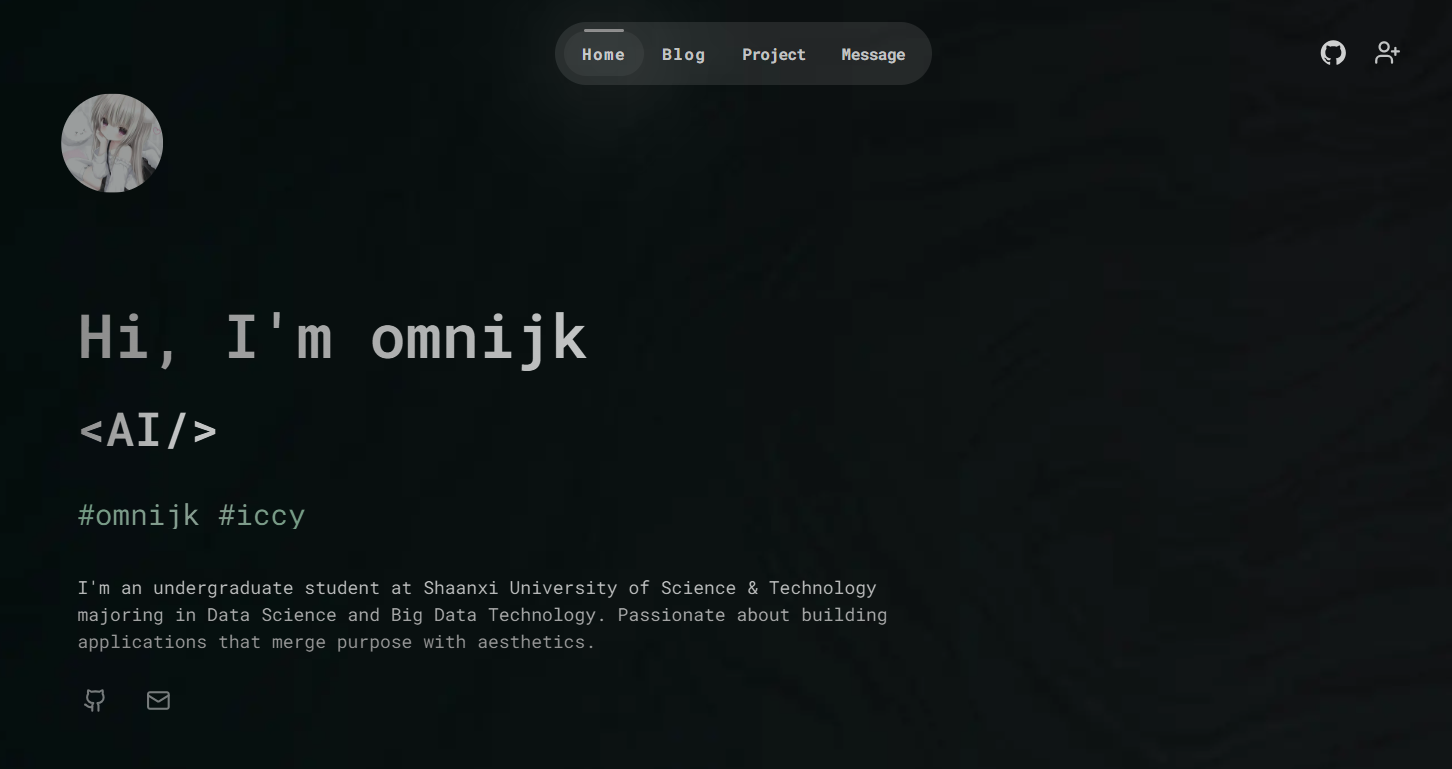
omnijk.com
omnijk
omnijk.com 的技术栈、环境配置和项目启动步骤。
⚙️ 技术栈
- 前端框架:React + Next.js
- 样式方案:Tailwind CSS + Shadcn UI
- 动画:Framer Motion
- 数据库:Supabase
- ORM:Prisma
- 内容管理:Sanity
- 身份认证:Clerk
- 部署平台:Vercel
💡开始上手
环境要求
- Node.js 18.18 或更高版本。
克隆仓库
git clone https://github.com/eurooooo/omnijk.com.git
cd omnijk.com
安装依赖
npm install
配置 .env 文件
在项目根目录创建 .env 文件,并写入以下内容:
# clerk
NEXT_PUBLIC_CLERK_PUBLISHABLE_KEY=
CLERK_SECRET_KEY=

# supabase
DATABASE_URL=
DIRECT_URL=

# sanity
NEXT_PUBLIC_SANITY_ID=
接下来需要把这些环境变量都补齐。
Clerk 配置
- 前往 Clerk 官网 创建一个应用,并把 Google 和 GitHub 设为登录方式:

- 把 Clerk 提供的环境变量复制到
.env文件里。
Supabase 配置
-
前往 Supabase 创建一个新项目。重要: 请先把密码记下来,后面的第 3 步会用到。Supabase 初始化可能需要几分钟。

-
点击右上角的 “connect”,然后选择 ORMs:

-
把环境变量复制到
.env文件中,并把密码占位符替换成第 1 步保存的密码。 -
在终端执行:
npx prisma db push
Sanity 配置
- 在终端运行下面的命令。你也可以把 “omnijk.com” 换成别的项目名。
npm create sanity@latest -- --template clean --create-project "omnijk.com" --dataset production --output-path sanity
-
然后系统大概率会要求你登录。登录后继续按照提示操作:

-
进入
/sanity/schemaTypes文件夹,把下面的代码粘到index.js:
import { projectsType } from "./project";

export const schemaTypes = [projectsType];
在同一个文件夹里,再新增一个名为 project.js 的文件:
import { defineField, defineType } from "sanity";

export const projectsType = defineType({
  name: "project",
  title: "Project",
  type: "document",
  fields: [
    defineField({
      name: "title",
      type: "string",
      validation: (Rule) => Rule.required(),
    }),
    defineField({
      name: "image",
      type: "image",
      validation: (Rule) => Rule.required(),
    }),
    defineField({
      name: "description",
      type: "text",
      validation: (Rule) => Rule.required(),
    }),
    defineField({
      name: "link",
      type: "url",
      validation: (Rule) => Rule.required(),
    }),
    defineField({
      name: "tags",
      type: "array",
      of: [{ type: "string" }],
      validation: (Rule) => Rule.required().min(1),
    }),
  ],
});
- 前往 Sanity 管理后台 获取 project id,然后把它填到
.env文件里的NEXT_PUBLIC_SANITY_ID。
- 在终端继续执行:
cd sanity
npm run dev
- 打开 localhost:3333,现在就可以往网站里添加项目了。
启动项目
🎉 到这里就可以启动网站了:
npm run dev
然后访问 localhost:3000 查看实际效果。